
GOOSE LEGS, CONFIT
Corey Mulhair at SPLIT REED
By now there’s a good chance that the phrase sous-vide has slipped into your ear- and for many, it’s also gone right out of the other. It’s a relatively new convenience to the home kitchen and frankly, in my opinion, it’s invaluable when it comes to the everyday home cook with a freezer full of wild game. If you don’t have a sous vide immersion circulator/cooker then you can use a crockpot with enough water to cover the legs, and then some, on high- to cook the vacuum-sealed (or bagged by immersion method) legs.
More below!
Sous vide Basics
(skip to the recipe/directions below if you are familiar)
Sous vide is French for “under vacuum”. Bagged food (with no air in the bag) is placed in a water bath in a container full of water (stock pot, plastic container, cooler). An immersion cooker/circulator (such as the ANOVA, ANOVA Nano, Joule, Sansaire) mounted to the container heats the water- and by convection- the bagged food. It is cooked at a specific temperature for some time. The cooker maintains a specific temperature to +/- 0.1 degrees as well as circulates the water for even cooking.
The beauty of sous vide is that because you set the temperature to which the water is heated, the food never gets cooked past the target internal temperature. Longer cook times can be used help break down connective tissues to make even tough cuts desirable. Set the temperature and come back after a predetermined amount of time. The food will be perfectly cooked and only needs to be finished with some quick direct heat. This gives the texture and visual look that we want. Sous vide can help even the most helpless home chefs deliver Michelin star restaurant quality meals.
Goose Legs, Confit via Sous-vide
Now that you understand the thermodynamics of cooking using water, we’ll move on to something you probably never thought you would enjoy. Goose legs. The first time tucked into a layout in the goose decoys, telling my hunting buddies to make sure they didn’t shoot the birds in the ass because they’d ruin the thighs for me- I got some dumb looks. But the next day, taking their first bites of sous vide confit goose legs, they saw the light.
Most states require only that you remove breasts from waterfowl, per wanton-waste laws, but you really should consider saving legs to mix things up. Give this recipe a try!
To be transparent, this recipe will be good for any and all waterfowl legs/thighs. Snows, honkers, cacklers, swans, cranes and big mallards all have enough meat to make it worth it. Other ducks obviously will have fine table-fare legs but I’m not going to expect you to start saving teal legs unless you’re already plucking birds whole.
Step ONE. Per usual, kill some geese. For the sake of your first go hopefully you’ve just shot some big honkers. I do recommend using 4 birds for each batch (eight legs). No picture needed, you know what dead waterfowl look like.
Step TWO. Remove the legs from the carcass. If you aren’t familiar with how to completely break down a goose, the click the button below. Trim any bloodshot and try to use legs without broken bones, they can puncture the bag.
Prep and Recipe
8 Goose (waterfowl) legs
Pink Curing Salt
Coarse Kosher Salt
Optional - Pepper or paprika/chipotle powder
Rendered fat (waterfowl fat is optimal, pork or bacon fat works great too)
A proper confit means you need to cure the meat for a couple of days before you cook the meat. I’ve found that the best method takes 3 days of curing to allow the cure to penetrate entirely through the leg.

Step THREE.
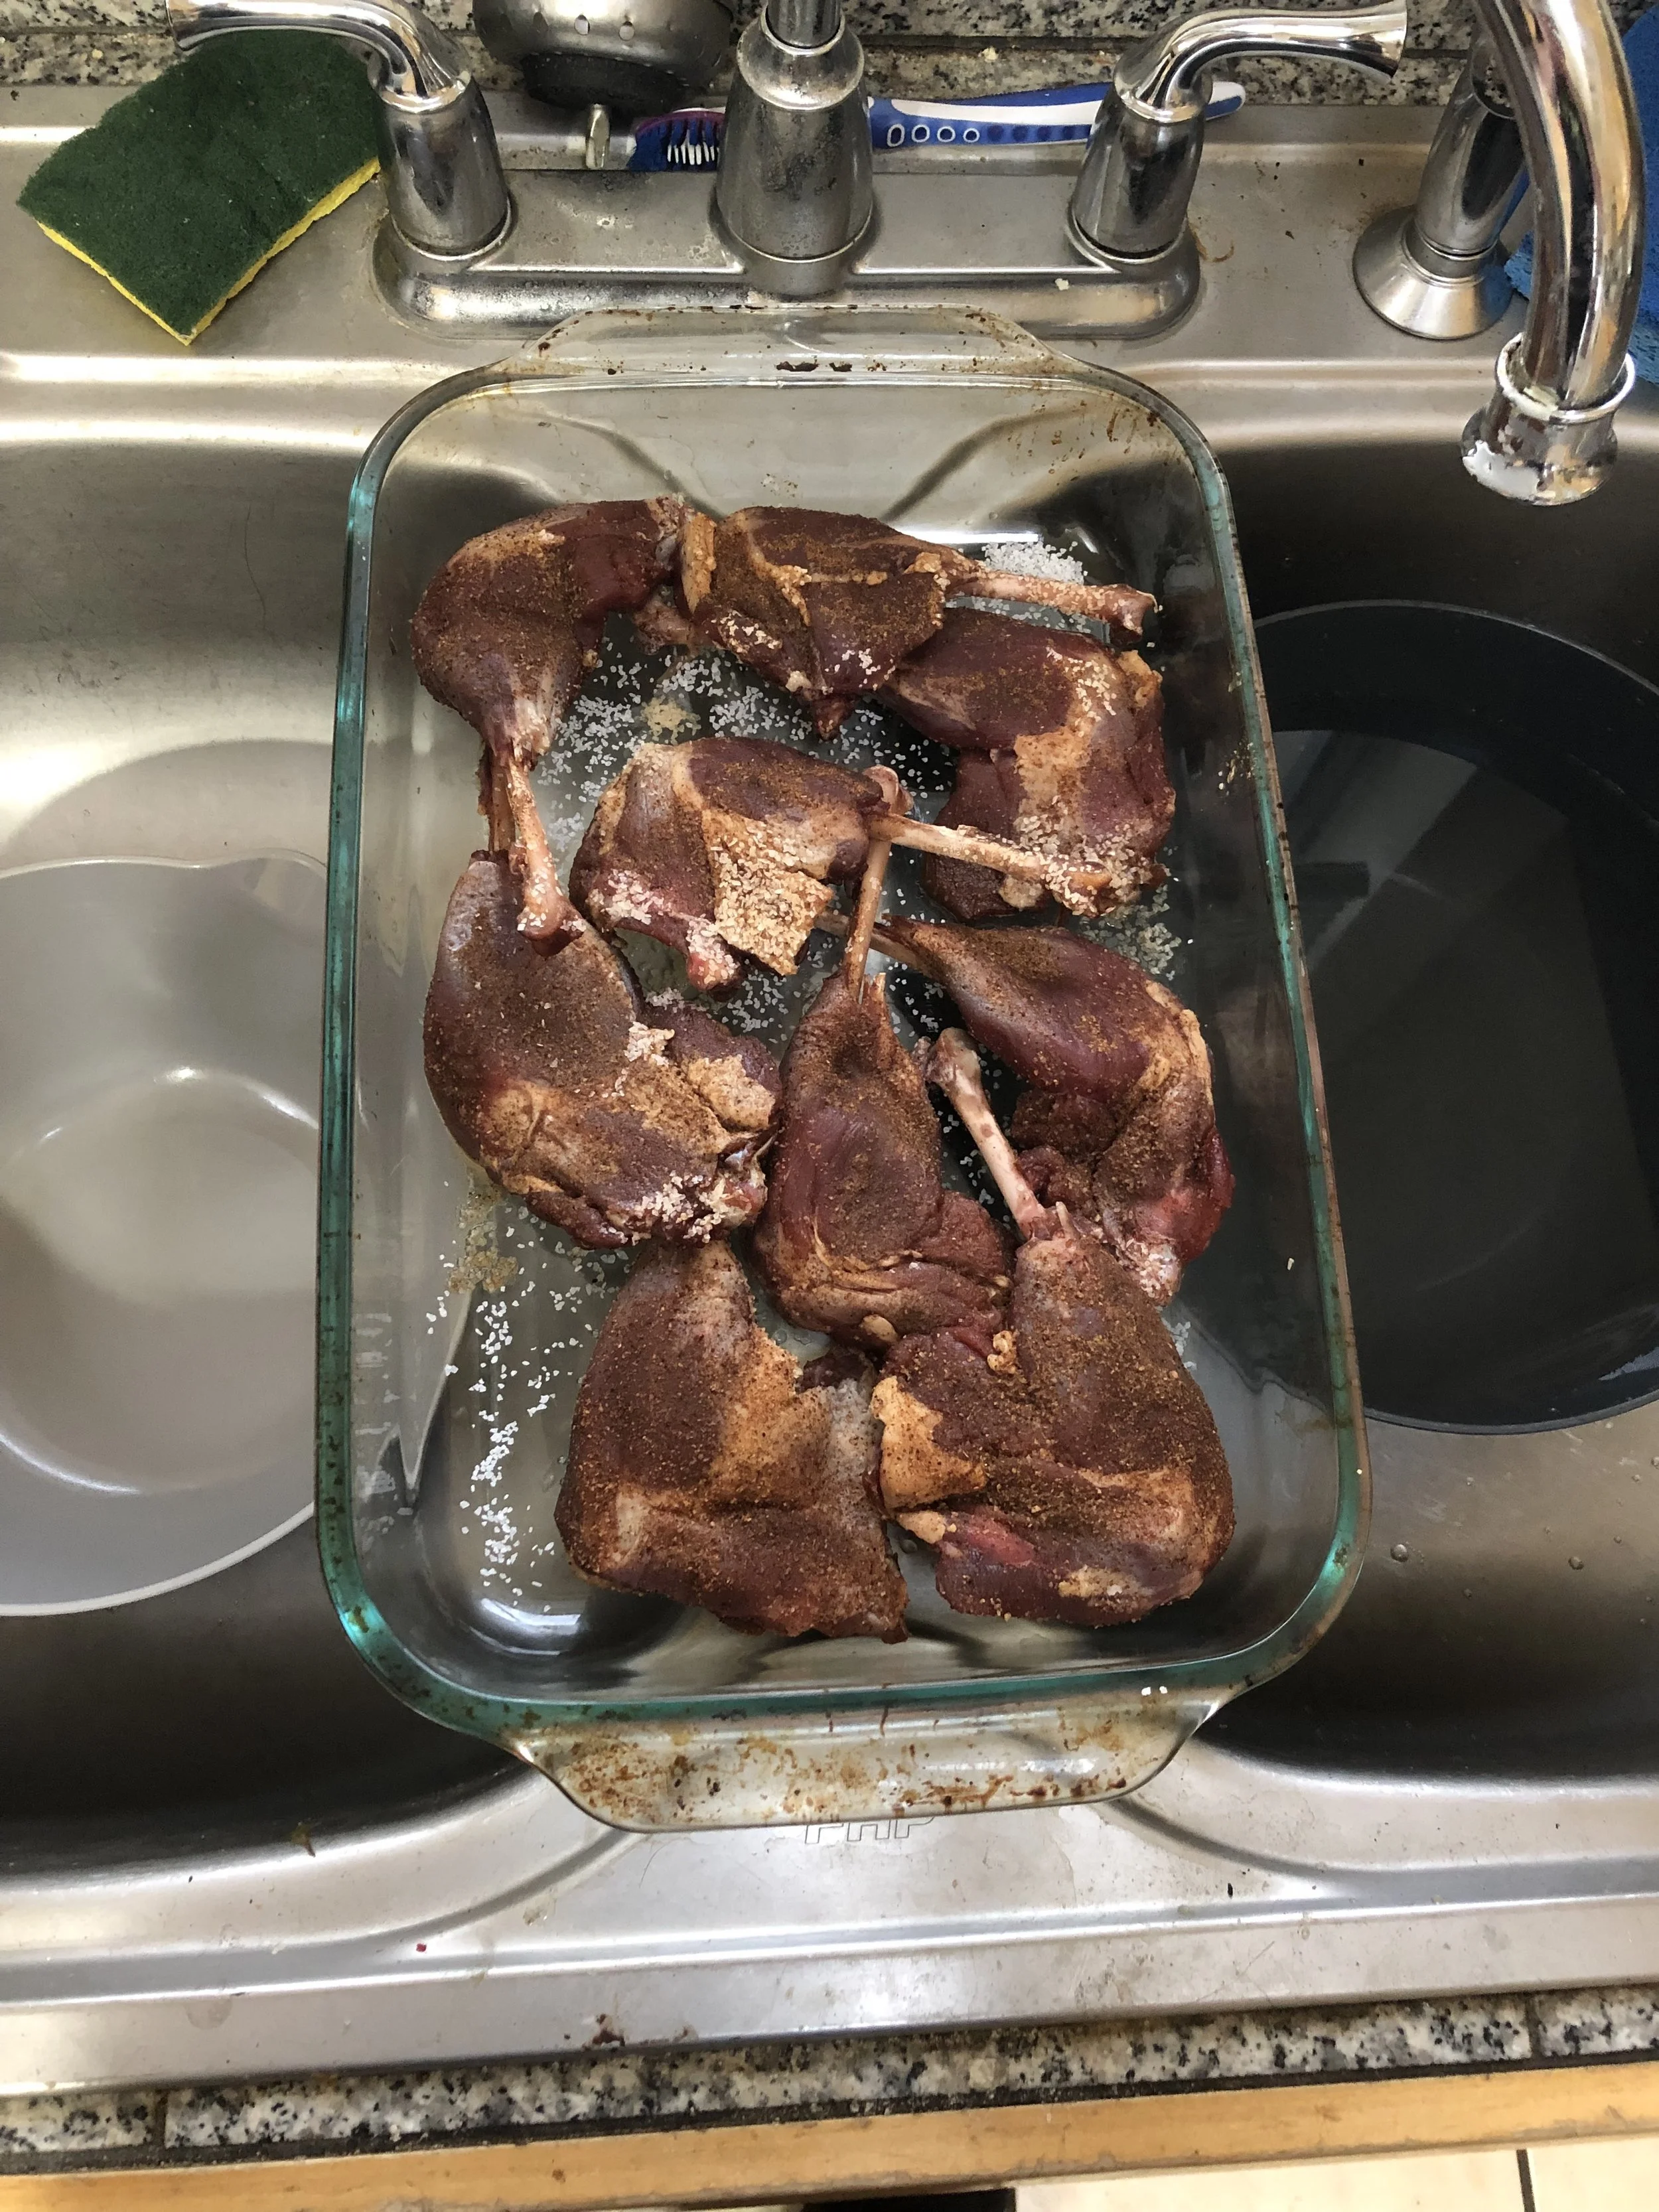
Dry the legs before salting and curing. Rub a pinch of pink salt, and a pinch of salt (I use coarse kosher salt) on each side of each leg. After that, season with any pepper or other seasoning you want to use. I often use a blend of black pepper, chipotle powder and garlic powder. Liberally cover each side.
Step FOUR.
Place legs in an uncovered baking pan or on a cookie sheet in the refrigerator. After 24 hours, flip the legs over so that both sides dry and cure evenly. After another 24-48 hours remove from the refrigerator and thoroughly wash the legs off, removing salt and seasonings. They should have penetrated the meat and flavor will be imparted by then.

Step FIVE.
Once the legs are washed, allow them to air dry while you prepare the bag. Place the legs in a vacuum seal bag and add your fat. The best fat is clean, rendered goose or waterfowl fat from wheat or corn feeding birds. I alternate between goose and pork fat, both of which are suitable for home confit.

Step SIX & SEVEN
Step SIX. If you want to add a little more seasoning, go ahead. Depending on how much you added during the cure you may or may not want to. Seal the bag with the goose legs, and the fat.
Step SEVEN. Drop in sous vide water bath set to 165 degrees F and allow to cook for 24 hours.
Alternatively, you can drop the bag in a crockpot set on ‘high’ for a day.

Step EIGHT.
Remove the bag from the water bath and then the legs from the bag. Toss the bag and the liquid in it.
The connective tissue that makes goose legs so tough should be rendered down to a gelatin material and perfect for eating off the bone.
The best way to finish the legs on the bone is over a low charcoal or bbq grill. Cook until you get a little char.

Step NINE.
Alternatively, instead of bbq’ing to add a little char and smokey flavor, you can remove the legs from the bag and simply pull the meat from the bone. It will look nice and pink/red because of the curing salt. Eight greater Canada goose legs will produce nearly 1 pound of pulled meat.
From here you can use the pulled confit goose legs a number of ways. Add it to a salad or to an omelette. Add it to a pan fried vegetable medley or dish. Or just simply snack on pulled goose meat.
Pulled confit goose leg meat can last for a few weeks in the fridge.

Click onCorey to find him on Instagram